Tuesday, November 27, 2007
A Quick Update
Next projects:
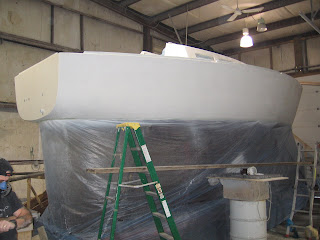
1) Removing the bottom paint, I'm doing this the hard way...with a scrapper. No matter how cold it gets I can still get the job done.
2) Finish fairing the hull liner, prime and paint. I'll see if a heater can bring the internal temperature of the boat high enough to paint. If not I'll have to wait until spring.
3) Rebuild the rudder
4) Finish the wood work
5) Cushions to be recovered
Tuesday, November 20, 2007
Polishing the Port Side Hull
So we can assume 2 things:
1) Wow, a cut and buffed paint job looks beautiful!
2) Damn Jason, your ability to spray a quality coat of paint sucks!


Sunday, November 18, 2007
Cutting (sanding) the port side
These pictures are the result:


In this last picture the flash shows the swirl mark of the cutting compund, the final coumpund will remove these swirls.
Saturday, November 17, 2007
The Hull Paint....NOT GOOD ENOUGH!

So what's next....
Well I've researched "cutting and buffing" or call it "colour sanding". Here are a couple of websites describing the process:
http://www.autobodystore.com/rsw.shtml
http://www.repairnation.com/paint_n_bodywork/buffing/wetsand&buffing2.htm
This is the benefit of Awlcraft over Awlgrip and that's it's ability to be buffed and polished. I figure if your going to race your boat your going to need a paint that can be touched up. With my experience with Awlgrip is you get a tough, beautiful finish but your screwed if you damage it!
So these are pictures of my first attempt at cutting and polishing:
The Transom (took about 1.5 hours to get this result) This Finish is like a mirror...the kind of result you would expect from a professional sprayed Awlgrip job. I like it so I'll contiinue.
 This picture displays the contrast between the cut and buff (the transom) and the aft starboard quarter which has yet to be done.
 Same as this picture, look at the clarity of the tree in the transom and the blurry tree in the aft port quarter.
Monday, November 12, 2007
Thursday, November 8, 2007
The non-skid
 Non-Skid was applied by mixing 1 part awlgrip colour base (whisper grey) with 1 part converter then mixing with Silica until as thick as drywall mud. After the "shinny stuff was tapped off" I rolled it on with a meduim nap roller. Using a clean unused meduim nap roller to roll over the paint to ensure an even look.

Wednesday, November 7, 2007
Tuesday, November 6, 2007
First 3 coats of Vivid Red
Saturday, November 3, 2007
The J30 is finally under a roof!
 This J/30 Hull number 124 has had 7 soft spots cut out of the transom and deck with new balsa glassed back in. These areas are now faired and ready for primer.
 The fall weather is getting pretty cool in Nova Scotia so I managed to acquire a roof for a week where I will prime and paint the boat using Awlgrip products.
Monday, October 29, 2007
Wednesday, October 24, 2007
Thu-Hulls in the Transom
 The picture below shows the holes in the transom on the port side. As you can see the thru-hulls expose the balsa wood. If the thu-hull seal is faulty then the water is going to get in. These two are dry and solid but I will be grinding out about an inch of balsa around the hole and filling with thickened epoxy which will:
 A picture of the port side with solid epoxy protecting the balsa wood.
Refinishing the Woodwork - Work taken on by my Father
 A Mess to clean up
 More Mess!
 Starboard side unfinished
 Port Side Finished - Thanks for doing all this woodwork Dad!


